

If you’re embarking on a DIY project involving renovating or building interior walls, hanging plasterboard is likely a crucial step. Plasterboard, also known as drywall or gypsum board, is a versatile material used to create smooth and even surfaces for walls and ceilings. Whether you’re a seasoned DIY enthusiast or a novice looking to take on a new challenge, here’s everything you need to know about hanging plasterboard in your project.
Tools & Materials:
Before you start, ensure you have the necessary tools, materials, and drylining supplies you will require. Here’s a list of items you’ll need:
- Plasterboard sheets
- Screws or nails
- Screwdriver or hammer
- Utility knife or plasterboard saw
- Tape measure
- Pencil
- Straight edge or spirit level
- Plasterboard adhesive
- Jointing compound
- Jointing tape
- Dust mask and safety goggles
Planning and Preparation:
Measure the dimensions of the walls or ceilings where you intend to install the plasterboard. Plan the layout to minimize the number of joints, especially in highly visible areas. Remove any existing fixtures or fittings from the area.
Cutting and Fitting:
Mark the dimensions of the plasterboard sheets you need to cut using your tape measure, pencil, and straight edge. Score along the marked lines using a utility knife, then snap the board along the score lines. Use a plasterboard saw for more precise cuts around obstacles like outlets and switches, or you can also use a bread knife.
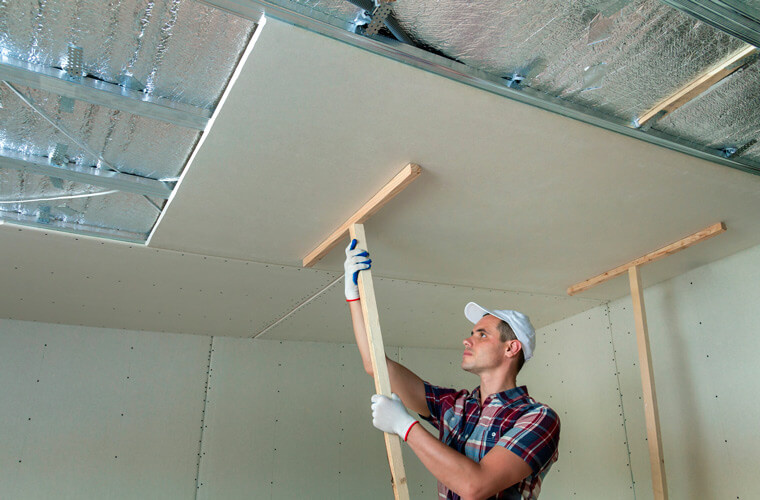
Fixing the Plasterboard:
Start at the corner of the room and work your way along one wall. Hold the plasterboard sheet against the wall, ensuring its level and flush. Use screws or nails to secure the plasterboard beneath the studs or joists. It’s recommended to place fixings every 6-8 inches along the edges and every 12 inches in the field of the sheet.
Dealing with Joints:
Where two sheets of plasterboard meet, leave a small gap of about 1/8 inch to allow for expansion. Apply plasterboard adhesive along the edge of the first sheet before fitting the next one. Screw or nail the second sheet into place. The adhesive helps reduce the risk of cracks forming at the joints.
Corners and Edges:
Cut the edge of one plasterboard sheet at a 45-degree angle for internal corners using a utility knife, or plasterboard saw. You should also cut the adjoining sheet at a 45-degree angle. Apply adhesive to the cut edges before fitting them together. For external corners, use corner beads to ensure a clean finish.
Taping and Jointing:
After all the plasterboard sheets are in place, it’s time to tape and joint the seams. Apply jointing compound to the seams using a trowel, ensuring the compound is spread evenly. Place jointing tape over the compound and press it in. Apply a second compound layer over the tape, feathering the edges to create a smooth surface. Let it dry according to the manufacturer’s instructions.
Sanding and Finishing:
Once the jointing compound is dry, sand the surface to create a seamless finish. Wear a dust mask and safety goggles to protect yourself from the fine particles. Wipe away any dust with a damp cloth.
Priming and Painting:
Before painting, it’s essential to prime the plasterboard to ensure the paint adheres properly. Choose a primer suitable for plasterboard and follow the manufacturer’s instructions. Once the primer is dry, paint the plasterboard your desired colour.


Comments